

Delightful Cake Pops: A Simple Guide to Sweet Indulgence
It’s one of those cozy afternoons when the sun streams through the kitchen window, casting a golden glow on everything it touches. The air is rich with the enticing aroma of baked treats, and my little ones are buzzing with excitement at the thought of something sweet. Cake pops are on the agenda today—a delightful concoction that’s all about creativity, color, and that joyful bite of cake covered in sweet candy coating. They bring a smile to faces young and old, turning an ordinary day into a mini celebration.
As we gather ingredients and begin our cake pop adventure, it’s not just about the process—it’s a moment to bond, to create together, and to savor the experience. No need for perfection here; just a sprinkle of love, a dash of fun, and a few colorful toppings to make everything feel festive. So, let’s dive into this simple and delightful recipe that’s perfect for busy families craving a sweet treat!
Why You’ll Love This Recipe
These delightful cake pops are not only fun to make, but they also allow for endless customization! Whether you want to create a special treat for a birthday party, a cozy afternoon snack, or even a unique dessert to share with friends, this recipe has you covered. The combination of fluffy cake and smooth candy coating is just heavenly. Plus, the opportunity to personalize each pop with vibrant sprinkles or other toppings makes the whole experience even more enjoyable.
And let’s not forget the ease of preparation! With just a few ingredients and a little love, you can whip these up in no time. They’re perfect for little hands to help with, making it a fantastic way to bond while baking. Whether you enjoy them fresh or save some for later, these cake pops are sure to bring joy!
Ingredients for Starbucks Cake Pop Recipe
- 1 box vanilla cake mix
- 1 cup frosting (your preference, store-bought or homemade)
- 1 cup melted candy coating (you can use your favorite colors!)
- Lollipop sticks
- Sprinkles (optional, but highly recommended for some extra flair!)
Ingredient Notes
- Cake Mix: You can feel free to swap the vanilla for chocolate cake mix, if that’s your family’s favorite!
- Frosting: For a more health-conscious alternative, consider using yogurt-based frosting or even a homemade version with less sugar.
- Candy Coating: If you prefer to avoid artificial colors, look for natural candy coatings or even dip in melted chocolate instead!
- Lollipop Sticks: If you don’t have lollipop sticks on hand, you can also use pretzel sticks for a fun twist.
How to Make It
Making cake pops is a delightful process that involves just a few simple steps. Grab your apron, turn on some cheerful music, and let’s get started!
Step 1 – Bake the Cake
Begin by preparing the vanilla cake mix according to the package instructions. Pour the batter into a 9×13 inch pan and let it bake until it’s golden and a toothpick comes out clean. Once baked, allow the cake to cool completely—this is the perfect time to tidy up your space or enjoy a little break with a hot cup of tea!
Step 2 – Crumble the Cake
Once the cake is cool, it’s time to get your hands a little messy (in the best way!). Crumble the cake into a large bowl until you have a fine texture. This step is fun for kids, too—just let them dive in and crumble away! The goal is to get it fluffy and crumbly enough so that it will hold together when mixed with the frosting.
Step 3 – Mix with Frosting
Add the cup of frosting to your crumbled cake and mix thoroughly. You’re looking for a dough-like consistency that holds its shape well; it should feel slightly moist but not overly sticky. If you want to cut back on sweetness, try using just half the amount of frosting to start and mix until you reach your desired taste and texture.
Step 4 – Roll into Balls
Next, take small portions of the mixture and roll them into balls. Aim for about one inch in diameter for each cake pop—whatever shape they become, it’s all part of the charm! Place the rolled cake balls gently on a baking sheet.
Step 5 – Chill the Cake Balls
Once all your balls are rolled, refrigerate them for approximately 30 minutes, or until firm. This will help them hold their shape when they’re dipped in candy coating.
Step 6 – Prepare the Lollipop Sticks
Take your lollipop sticks and dip the tips into the melted candy coating. This helps secure the stick inside the cake ball. Gently insert the stick into each ball, being cautious not to push it all the way through.
Step 7 – Dip in Candy Coating
Here comes the fun part—dipping! Dip each cake pop into the melted candy coating, allowing the excess to drip off. Don’t rush this step; the more coating you have, the better!
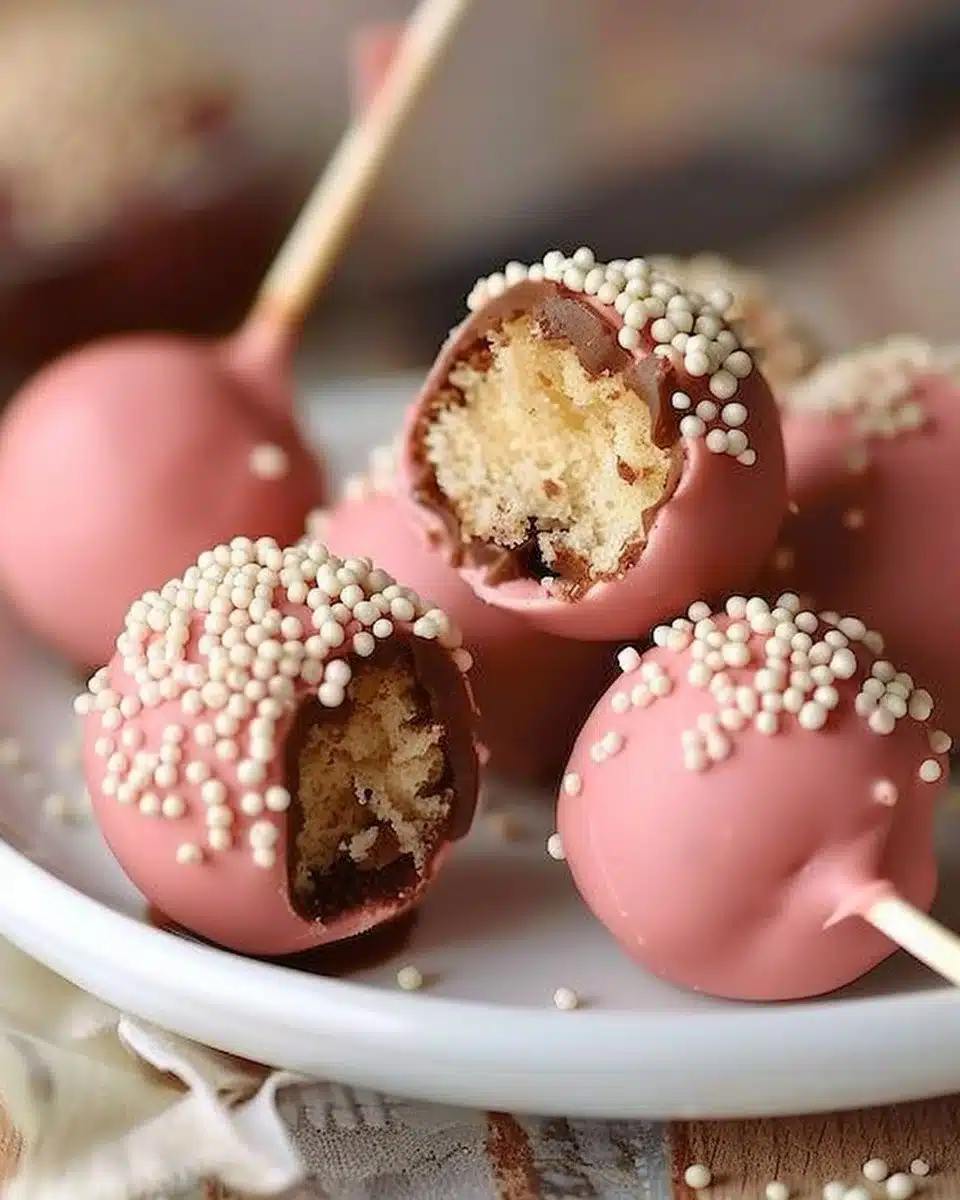
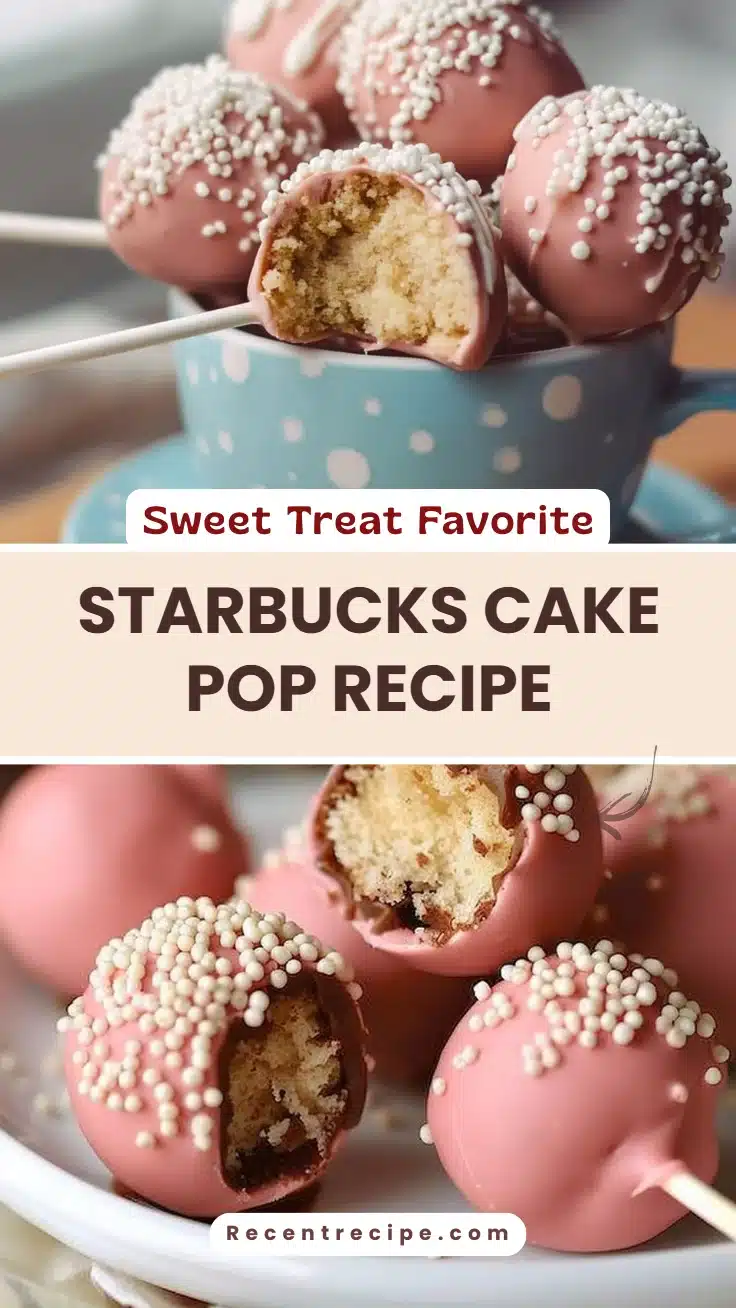
Step 8 – Decorate and Set
Before the coating hardens, sprinkle your cake pops with colorful sprinkles if you’re using them. Place the finished cake pops in a styrofoam block or insert them into a decorated cake to hold them upright while they set.
Tips for Success
- Make sure your cake balls are completely chilled before dipping; this prevents them from falling apart in the coating.
- Experiment with different candy coating flavors—dark chocolate, milk chocolate, and even white chocolate all work beautifully!
- Let your kids go wild with the sprinkles and toppings—this is where their creativity shines!
- If the pressure is too high for the pops, thin out the candy coating slightly with a little vegetable oil for better results.
Recipe Variations
- Chocolate Lovers: Substitute chocolate cake mix for vanilla and dip in chocolate candy coating for a double chocolate treat.
- Seasonal Fun: Change up the colors of the candy coating and sprinkles according to seasons or holidays—red and green for Christmas, pastels for Easter!
- Nutty Delight: Roll your pops in crushed nuts or shredded coconut after the candy coating for an exciting texture twist.
- Fruit Fusion: Add finely chopped dried fruit to the cake mixture for a fruity flavor and chewy texture.
- Fudgy Center: Mix in a couple of tablespoons of cocoa powder with the frosting to give the center an extra chocolaty kick.
Serving Ideas
These delightful cake pops can be served at any gathering, from birthday parties to cozy family get-togethers. They also make enchanting wedding or baby shower favors when beautifully packaged. Arrange them on a festive platter, or create a fun display using a cake pop stand to showcase their colorful glory!
Storage and Freezing
Once you’ve made your cake pops, they can be stored in an airtight container at room temperature for up to three days. For longer storage, place them in the freezer in a single layer, then transfer to a sealed container. They should keep well for about a month. Just allow them to thaw completely before enjoying them again!
Nutrition Facts (per serving)
| Calories | Protein | Carbs | Fat | Fiber | Sodium |
|———-|———|——-|—–|——-|——–|
| 150 | 2g | 18g | 7g | 0g | 50mg |
FAQ About Starbucks Cake Pop Recipe
How can I make the cake pops gluten-free?
To make gluten-free cake pops, simply use a gluten-free cake mix and ensure that the frosting and candy coating you select are also gluten-free. There are plenty of great options available these days!
Can I use any flavor of cake mix?
Absolutely! Experiment with different flavors of cake mix, like red velvet, lemon, or even funfetti for added color and delight.
What if my cake pops don’t stick to the lollipop sticks?
If this happens, try dipping the lollipop sticks in melted candy coating before inserting them into the cake balls. This will help create a stronger bond.
What are some alternative toppings I can use?
Beyond sprinkles, try using crushed cookies, mini chocolate chips, or toasted coconut for unique textures or flavors on your cake pops.
How do I safely melt the candy coating?
You can melt candy coating in a microwave-safe bowl in short bursts, stirring in between until smooth. Alternatively, use a double boiler to melt it gently on the stove.
In a Few Words
Cake pops are more than just a dessert; they’re a creative outlet, a chance to collaborate in the kitchen, and a sweet way to share love. Every bite is a reminder of the memories we create while cooking together, the giggles shared, and the warmth of family.
Conclusion
Crafting these lovely cake pops has reminded me that the journey of cooking is equally as rewarding as the end result. They embody the spirit of fun, creativity, and togetherness that makes our kitchen feel like home. So go ahead, dive into the recipe, let the kids get involved, and most importantly, enjoy every moment! Whether you’re nibbling on a pop while watching a movie or sharing them with friends, these little bites of happiness will surely bring smiles all around. Happy baking!
Print
Delightful Cake Pops
- Total Time: 45 minutes
- Yield: 24 servings 1x
- Diet: Vegetarian
Description
A fun and creative dessert combining fluffy cake and smooth candy coating, perfect for family bonding and celebrations.
Ingredients
- 1 box vanilla cake mix
- 1 cup frosting (your preference)
- 1 cup melted candy coating (your favorite colors)
- Lollipop sticks
- Sprinkles (optional)
Instructions
- Prepare the vanilla cake mix according to package instructions, bake, and cool.
- Crumble the cooled cake into a large bowl until fine.
- Add frosting and mix until a dough-like consistency is reached.
- Roll mixture into balls about one inch in diameter and place on a baking sheet.
- Refrigerate for approximately 30 minutes to firm up the cake balls.
- Dip lollipop sticks into melted candy coating and insert into each cake ball.
- Dip each cake pop into melted candy coating and allow excess to drip off.
- Sprinkle with toppings before the coating hardens and let set in a styrofoam block.
Notes
Chill cake balls completely before dipping to prevent falling apart in the coating. Experiment with flavors and toppings for variety.
- Prep Time: 15 minutes
- Cook Time: 30 minutes
- Category: Dessert
- Method: Baking
- Cuisine: American
Nutrition
- Serving Size: 1 pop
- Calories: 150
- Sugar: 12g
- Sodium: 50mg
- Fat: 7g
- Saturated Fat: 3.5g
- Unsaturated Fat: 3.5g
- Trans Fat: 0g
- Carbohydrates: 18g
- Fiber: 0g
- Protein: 2g
- Cholesterol: 0mg
Keywords: cake pops, dessert, baking, family fun, sweet treat


1 réflexion au sujet de « Starbucks Cake Pop Recipe »