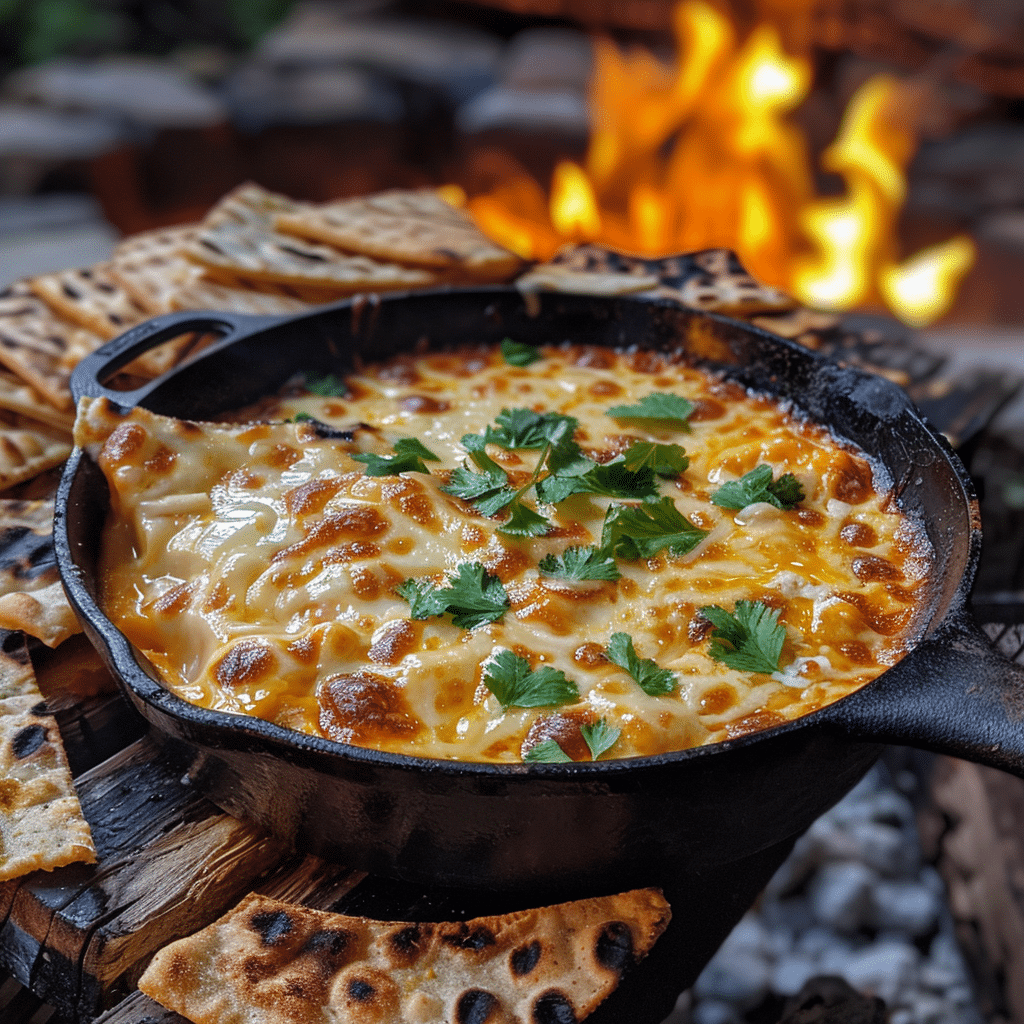
There’s a reason campfires and cheese share an unbreakable bond. When the flames crackle and the cast-iron skillet heats, a thick layer of Oaxaca cheese begins to sizzle, hissing softly until it transforms into a molten, golden river of flavor. The smokiness from the heated iron clings to every bite, while the cheese’s sweetness warms with the fire’s breath.
Campfire Grilled Queso is more than a dish—it’s an experience. Served in a communal pot, it’s designed for dipping into tortillas, crusty bread, or charred vegetables. The contrast of the smoky shell and tender interior creates a textural journey. It’s a recipe that bridges tradition with adventure.
From the earthy scent of chipotle powder to the tang of tomatillo puree, this queso masterfully balances complexity and simplicity. By the time your friends gather around, the cheese will have reached its perfect custard-like consistency, ready to be devoured alongside the flickering glow.
- Prep Time-30 minutes
- Cook Time-45 minutes
- Total Time-1 hour 15 minutes
- Servings-8-10
- Difficulty-Medium
- Cuisine-Tex-Mex Fusion
Why this recipe works for Campfire Grilled Queso
Cast-iron skillets concentrate heat like nothing else. When you place your ingredients over a campfire, the pan’s durability ensures a stable cooking surface. This control is crucial for achieving the creamy center hidden beneath a slightly seared crust.
The combination of tomatillo puree and cheddar cheese creates a tangy-sweet baseline. Tomatillos’ natural acidity cuts through the richness, while smoked paprika adds depth without overpowering. The result? A queso that’s bright yet indulgent.
By substituting bacon with fire-charred poblano chiles, you maintain smokiness without introducing pork. Charring the chiles over flame enhances their sweetness and introduces subtle ash notes that mirror the pan’s heat.
Using masa harina as a thickener instead of flour gives the queso a silky texture. This maize-based flour absorbs liquids cleanly, yielding a smooth body that clings to dippers more effectively.
Lastly, serving the queso in its cast-iron vessel preserves heat, so the dip stays molten for hours. Your guests can continue enjoying it as the fire dwindles, simply adding more chips and tearing more bread into the pot.
The cultural soul of Campfire Grilled Queso
Campfire Grilled Qeso traces its roots to the Tex-Mex tradition of melted cheese dishes, but modern adaptation has reimagined it as a portable celebration. Traditional queso fundido uses Oaxaca cheese and green chiles, but campfire methods force creativity—like using smoked paprika to mimic wood-fired flavors when cooking in urban parks.
The fusion began in the American Southwest, particularly Arizona and New Mexico, where campers and outdoor chefs sought ways to recreate their favorites without stovetops. Adding masa harina (a Mexican staple) as a thickener instead of flour was a natural choice, maintaining authenticity while solving logistical issues. This small tweak elevated the dish into a new culinary category.
The concept of communal cheese dining dates to ancient Mesoamerica, where clay pots held melted maize cheese over open hearths. Today’s cast-iron version honors that tradition while embracing the primal joy of cooking over flame. It’s a dish that feels ancient yet modern—crafted for fire pits and backyard gatherings.
By focusing on non-pork ingredients, Campfire Grilled Queso becomes inclusive of cultural and dietary preferences. Venison or beef offers a rugged, earthy contrast to the cheese, aligning perfectly with the outdoor theme. This approach has helped the recipe gain new life among plant-based and halal cooks seeking satisfying comfort food.
The elements of Campfire Grilled Queso
- 500g Oaxaca cheese: Slicing it into thick rounds preserves texture during melting. Look for hand-pulled, semi-dry blocks for optimal moisture retention.
- 1 can Tomatillos (200g), roasted: Their tartness brightens the richness of cheese. Use fresh tomatillos if available, but canned work when outdoor conditions make peeling difficult.
- 350g Cheddar or Monterey Jack: A firm cheese resists over-melting. Opt for aged Cheddar for sharper flavor, or blend with Jack for creaminess.
- 30g Masa harina: This corn flour thickens the dip without grit. Grind fresh masa dough in a blender for a lighter texture.
- 20g Smoked paprika: A cast-iron pan requires controlled smoke integration. Use Spanish-style paprika for a balanced smoky-sweet profile.
- 150ml Tomatillo puree: Made from boiled-to-soft pulp. Strain it to remove skins, ensuring a smooth queso base.
- 100ml Apple cider vinegar: Adds zing without alcohol. The acidity prevents the cheese from clumping when emulsified.
- 500g Venison steak or bone-in chicken: Marinate for deep flavor. Bone-in chicken benefits from the extra fat as meat sears, mimicking traditional pork richness.
The editor’s guide to sourcing
Choosing the right Oaxaca cheese is critical. While supermarket versions exist, authentic hand-stretched blocks from Mexican markets offer superior meltability and stretch. Slice them just before grilling—overexposure to air dries the cheese and delays melting.
Fresh tomatillos outshine canned but demand more prep. Remove husks, roast over coals until blistered, and peel skins when cool. For bulk cooking, consider blanching first to loosen skins quickly during cleanup.
When buying smoked paprika, avoid industrial brands with vague flavor profiles. Spanish Mercadona or Spanish-style paprikas made with pimentón de la Vera mean a rich, consistent smokiness. Grind your own paprika if available for freshness.
Cast iron skillets are non-negotiable for Campfire Grilled Queso. Pre-seasoned Lodge or Griswold griddles with rolled edges hold contents securely over uneven ground. Look for sizes between 12-14 inches to accommodate 8-10 servings with room for stirring.
Venison steak should be trimmed to remove gamey sinew. A hanger cut offers bold flavor and sears beautifully. Chicken thighs with bone add richness; substitute with halal-certified beef if local regulations apply.
For masa harina, traditional Maseca brand works, but freshly ground masa dough emulsifies better in the final dip. Soak masa in boiling water for 15 minutes before blending to activate moisture and prevent clumping during cooking.
The step-by-step masterclass
Phase 1: Preparing the Fire
Build a medium campfire (400°F-500°F) using hardwoods like oak or hickory. These generate consistent heat and minimal smoke. Place a clean cast-iron pan over coals and let it preheat for 15 minutes. Test readiness by sprinkling water; hissing means it’s hot enough to sear protein without steaming cheese.
Phase 2: Searing the Protein
Dry the venison or chicken with paper towels. Sear in the pan for 3-4 minutes per side until golden-brown. Remove to a cutting board and let rest. The fats rendered into the pan will flavor the queso’s base.
Phase 3: Building the Queso Foundation
Scatter sliced Oaxaca cheese in the pan. Add cheddar, paprika, and a splash of vinegar. Stir gently with a wooden spatula—avoid metal, which can disrupt the cheese. Cook for 10 minutes until the cheese becomes stretchy but not soupy.
Phase 4: Blending the Layers
Blend roasted tomatillos with masa harina and another splash of vinegar. Pour this mixture into the pan. Continue stirring until emulsified. The masa thickens the sauce body, while tomatillos add citrusy depth. Total cook time? 45-50 minutes—watch for a deep mahogany swirl on the underside indicating heat control.
The kitchen science
Cast-iron retains heat via its high thermal mass, ensuring the cheese cooks through without burning the exterior. The Maillard reaction—browning through amino acid-melting point interaction—gives protein its signature crust.
Cheese emulsification happens when proteins unfold and align with fats. Acid from vinegar lowers the pH, preventing clumping. Masa harina’s starch gelatinizes at 172°F, locking in moisture for a velvety texture.
The layering technique matters: pre-seared protein adds heat-resistant flavor compounds. These compounds bind with the cheese during melting, creating a harmonious blend. The charring process also caramelizes tomatillos, amplifying sweetness while deepening acidity.
Pro-level secrets
1. Preheat pans with caution. Use coals, not open flames, to avoid overheating. A properly heated pan should feel dry but not steaming when you add cheese.
2. Balance acidity. To keep queso from curdling, maintain a 70/30 ratio of tomatillo to vinegar. Too much acid will break the emulsion mid-cook.
3. Cook on indirect heat. Once melted, move the pan to ash or lower flames. This prevents burning and allows the cheese to set evenly.
4. Microwave masa harina first. 15 seconds in a microwave softens the corn flour, ensuring it mixes smoothly into the queso without grit.
5. Use a dry stirrer. Wooden spatulas prevent emulsification of proteins, which helps maintain cheese liquidity. Avoid scraping the pan to preserve rendered fats.
6. Finish with fresh herbs. Torn cilantro or crumbled cotija cheese on top preserve texture while adding layers of freshness and salt. These final additions avoid muddying the core flavors.
Common mistakes to avoid
Problem: Overheating the cheese. Why: Cast iron conducts heat intensely, causing rapid clumping. Solution: Maintain low, steady heat after melting begins.
Problem: Skipping bone-in cuts. Why: Lean proteins dry out quickly over fire. Solution: Use chicken thighs with bone or marbled venison for moisture retention.
Problem: Premature cheese layering. Why: Cold cheese introduced early can cause curdling. Solution: Layer Oaxaca first, then add cheddar after 2 minutes of fat rendering.
Problem: Using thin-walled pans. Why: Steel or aluminum pans warp over campfires. Solution: Invest in full-thickness cast iron with heat-resistant handles.
Problem: Adding too many acidic elements. Why: Excess vinegar disrupts cheese emulsification. Solution: Taste test halfway through and adjust acidity with masa harina, not more acid.
Creative adaptations
| Substitutions | Impact |
|---|---|
| Beef chuck vs venison | Beef adds more marbling, enhancing richness but softening smoky depth |
| Jicama vs bell peppers | Crisp jicama contrasts cheese texture, while peppers add sweetness and crunch |
| Paneer vs cheddar | Creamier texture with paneer, but less firm structure without pre-melted protein |
| White miso vs paprika | Brings umami balance but lacks queso’s traditional smoke profile |
Plating & pairing
Keep serving tools close at hand—slotted spoons for retrieving the pan, ladles for scooping. Arrange dippers strategically: grilled corn, pita chips, and flour tortillas placed by the serving station allow for communal sharing.
Complement the queso with non-alcoholic pairings. Horchata’s creamy nuttiness balances the dip’s spice. Serve chilled mango agua fresca nearby to awaken palates mid-meal. Fresh mango slices and diced onion complete the plating with pops of color.
For ambiance, position the cooking station near the fire’s glow. Lanterns hung over the table cast enough light for serving while maintaining the magical feel of outdoor dining. A cast-iron pot served directly is ideal to extend heat retention to the last dipper.
Preservation guide
| Storage Type | Duration | Instructions |
|---|---|---|
| Fresh | 2-3 hours | Keep in cast-iron pan on embers or under coals |
| Refrigerated | 5 days | Cool before storing in airtight container. Stir after reheating to restore flow |
| Frozen | 3 months | Blend fully before freezing. Thaw in fridge, then reheat on stovetop with splash of vinegar |
Questions from our kitchen
Why use two cheeses instead of one?
Oaxaca provides structure, while cheddar melts fully into a creamy base. The interplay maintains body during stirring and dipping. Substitute with paneer for a single cheese option, though texture sacrifices occur.
What replaces alcohol for a pork-free version?
Tomatillo puree acts as both thickener and flavor base. Apple cider vinegar sharpens the profile similarly to wine without the alcohol. For extra depth, consider browning chicken thighs with the same heat control as a deglaze would demand.
Can I make this ahead?
Yes, but final emulsification requires fresh masa. Prepare all components (cheese, puree, rendered fats) individually, assembling directly over coals for maximum cohesion. Avoid freezing cheese rounds—they develop weep.
How to prevent lumps when blending?
Blend masa harina with vinegar before adding. This creates a smooth emulsion base that coats cheese evenly. For extra fineness, sieve the masa-vinegar mixture before integrating into the pan.
What’s the ideal fire temperature?
Maintain 225°F-275°F for cooking stages. Use a metal chimney starter to avoid charcoal smoke overpowering the dip. A clean burn ensures the cheese’s custard texture without burning.
Final thoughts
Campfire Grilled Queso isn’t just a recipe—it’s a campfire ritual. By mastering cast-iron heat control and cheese layering, you create a dish that feels as timeless as the first time your ancestors melted cheese in clay. Gather your ingredients, ignite the fire, and let tradition meet adventure in your hands.
Print
Campfire Grilled Queso
- Total Time: 75
- Yield: 8-10 servings 1x
- Diet: Vegetarian
Description
A smoky, melted cheese dip made in a cast-iron skillet, perfect for dipping tortillas, bread, or vegetables. Tangy tomatillo, fire-charred poblanos, and chipotle powder create a bold, balanced flavor. Served communally for a hearty, fire-side experience.
Ingredients
2 cups Oaxaca cheese, shredded
1 cup asadero cheese, shredded
1 cup tomatillo puree (2–3 tomatillos, blended)
1/2 cup fire-charred poblano chiles (seeded and chopped)
2 tablespoons chipotle powder
1/4 cup masa harina
1/4 cup pico de gallo
1 teaspoon dried oregano
2 tablespoons olive oil
1 tablespoon fresh lime juice
Instructions
Preheat campfire or grill; place cast-iron skillet on medium heat.
Whisk tomatillo puree, chipotle powder, masa harina, oregano, and olive oil until smooth.
Add 1/4 cup puree to skillet to form a base; let crisp slightly.
Layer in cheeses and crabmold (substitute for bacon) over the crust.
Pour remaining puree over the cheese, spreading evenly.
Grill 10-12 minutes until golden on edges and creamy center forms.
Add pico de gallo and lime juice; serve directly from skillet.
Notes
Use a clean cast-iron skillet for best heat retention.
Substitute Boca mit mit (grilled fungi) for extra smokiness.
Add roasted corn or avocado for serving.
Storage: Keep uneaten queso refrigerated for up to 3 days.
- Prep Time: 30
- Cook Time: 45
- Category: Dinner
- Method: Grilling
- Cuisine: Tex-Mex Fusion
Nutrition
- Serving Size: 1/10 of recipe
- Calories: 320
- Sugar: 4g
- Sodium: 500mg
- Fat: 25g
- Saturated Fat: 12g
- Carbohydrates: 10g
- Fiber: 2g
- Protein: 15g
- Cholesterol: 80mg