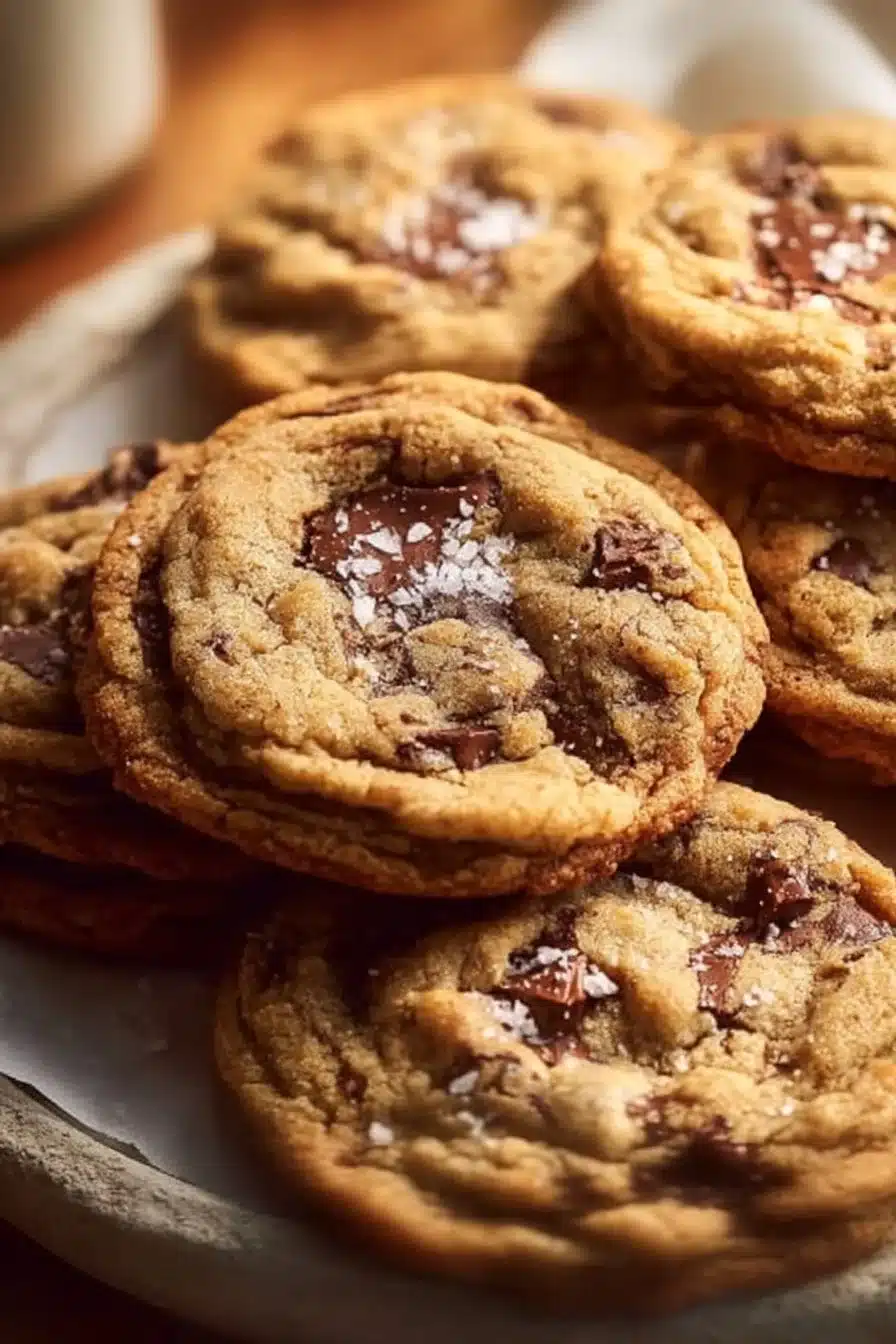
Cozy Brown Butter Chocolate Chip Cookies
There’s something undeniably heartwarming about the aroma of freshly baked cookies wafting through the house. I remember the days when I’d come home from school, the sweet, nutty scent of brown butter filling the air, signaling that my mom was busy in the kitchen. These Cozy Brown Butter Chocolate Chip Cookies are a nod to those fond memories, merging two comforting classics into one: the rich, deep flavor of brown butter and the irresistible charm of chocolate chip cookies. Trust me, these treats are as delightful to eat as they are to make.
Why You’ll Love This Recipe
These Brown Butter Chocolate Chip Cookies are not just any ordinary cookies; they’re a testament to the beautiful transformation that happens when simple ingredients meld into something extraordinary. The magic lies in browning the butter, which introduces a nutty richness that elevates the flavor profile of these cookies. The best part? They come together quickly and easily, making them perfect for those busy weekdays or leisurely weekends when you crave a warm, sweet pick-me-up.
Whether you’re baking with the kids, surprising a friend, or just treating yourself, these cookies promise to bring joy and comforting flavors to every bite. Get ready to embrace that cozy kitchen energy — you’re going to love how simple and rewarding this recipe is!
Ingredients for Brown Butter Chocolate Chip Cookies
- 1 cup unsalted butter
- 1 cup brown sugar
- 1/2 cup granulated sugar
- 1 teaspoon vanilla extract
- 2 large eggs
- 2 1/4 cups all-purpose flour
- 1 teaspoon baking soda
- 1/2 teaspoon salt
- 1 cup chocolate chips
Ingredient Notes
- Butter: Using unsalted butter allows you to control the saltiness, but feel free to swap it for a dairy-free alternative if needed.
- Sugars: The combination of brown sugar and granulated sugar gives these cookies a perfect balance of chewiness and sweetness.
- Chocolate Chips: Use semi-sweet, dark, or even white chocolate for a different twist. You can also mix in nuts like walnuts or pecans for extra crunch.
- Flour: All-purpose flour works wonders, but if you want to lighten the recipe a bit, you can substitute half with whole wheat flour.
How to Make It
Making these cookies is straightforward and perfect for both seasoned bakers and those just starting out in the kitchen. Let’s get those delicious aromas filling your home!
Step 1 – Brown the Butter
Start by melting the butter in a medium saucepan over medium heat. Stir occasionally as it melts. As the butter heats, it will begin to bubble, then foam, and finally, as it transitions into a beautiful golden brown, it will develop a nutty aroma that will entice everyone in the house! Once it reaches that lovely golden hue, remove it from heat and let it cool slightly.
Step 2 – Combine Sugars with Brown Butter
In a large mixing bowl, pour in the browned butter (make sure it’s not super hot!) and add both the brown sugar and granulated sugar. Mix everything well until it’s smooth and combined. This step helps to dissolve the sugars properly, giving your cookies a delightful texture.
Step 3 – Add Eggs and Vanilla
Now it’s time to introduce some richness! Add the vanilla extract, followed by the eggs one at a time, ensuring that you beat each egg in before adding the next. You want everything to be well incorporated for that lovely, creamy consistency!
Step 4 – Mix Dry Ingredients
In another bowl, whisk together the flour, baking soda, and salt. Gradually sift this dry mixture into your wet ingredients. Use a spatula to fold it in gently until just combined. Be careful not to overmix, as that can lead to denser cookies.
Step 5 – Fold in Chocolate Chips
The fun part comes next! Gently fold in the chocolate chips until they are evenly distributed throughout the dough. Each bite should be packed with delicious chocolatey goodness.
Step 6 – Shape and Bake
Preheat your oven to 350°F (175°C) while you prepare the baking sheets. Using a cookie scoop or your hands, scoop out balls of dough and place them on a parchment-lined baking sheet, leaving some space between them for spreading. Pop them into the oven and bake for about 10-12 minutes, until the edges are lightly golden, and the centers are still soft.
Step 7 – Cool Them Down
Once baked, let the cookies cool on the baking sheet for a few minutes before transferring them to a wire rack. This step is crucial as it allows them to firm up slightly and enhances those delightful textures.
Tips for Success
- Cool the Butter: Make sure your brown butter isn’t too hot when mixing with the sugars to avoid cooking the eggs.
- Chill the Dough: If you have time, refrigerate the dough for at least 30 minutes. It can help with the flavors and texture, resulting in a thicker cookie.
- Don’t Overbake: Remember that cookies will continue to cook a little as they cool, so take them out when they look just barely set in the center.
Recipe Variations
Feeling a bit adventurous? Here are some fun ways to switch things up with your cookie creation:
- Nutty Addition: Stir in some chopped walnuts or pecans for a satisfying crunch that complements the chocolate perfectly.
- Oatmeal Twist: Add 1 cup of rolled oats to the dough for a chewy texture and heartier cookie.
- Flavor Boost: Substitute 1/2 teaspoon of almond extract for part of the vanilla for a flavorful twist.
- Spiced Up: Mix in a teaspoon of cinnamon or a pinch of sea salt on top before baking for an extra flavor kick.
- Dried Fruits: Add a handful of dried cranberries or cherries for a unique tartness that balances all the sweetness.
Serving Ideas
These cookies are divine on their own, but here are some ways to elevate your cookie experience:
- Serve them warm with a scoop of vanilla ice cream for a comforting dessert that’s hard to resist.
- Pair with a glass of cold milk or a warm cup of herbal tea for the ultimate cozy treat.
- Bring them to gatherings or parties, as they’re sure to disappear quickly!
Storage and Freezing
To store your cookies, simply keep them in an airtight container at room temperature for up to a week. If you want to keep them longer, you can freeze the baked cookies: just place them in a single layer in a freezer-safe bag. They can last up to three months. To enjoy them later, simply thaw at room temperature or pop them in the microwave for a warm, freshly-baked taste.
Nutrition Facts (per serving)
| Calories | Protein | Carbs | Fat | Fiber | Sodium |
|———-|———|——-|—–|——-|——–|
| 150 | 2g | 21g | 7g | 1g | 60mg |
FAQ About Brown Butter Chocolate Chip Cookies
Can I use margarine instead of butter?
While butter gives a unique flavor and texture, you can substitute margarine for a dairy-free version. Just be sure to choose a good quality margarine for the best results.
How do I store leftover cookies?
To keep your cookies soft and delicious, store them in an airtight container at room temperature. For longer shelf life, you can freeze them.
Why did my cookies spread too much?
Cookies can spread too much if your butter is too warm or if you didn’t chill the dough. Next time, try chilling your dough for at least 30 minutes before baking!
Can I double the recipe?
Absolutely! Doubling the recipe is a great way to share the joy or to stock up for later. Just ensure that you have enough storage space for those delicious cookies!
What if I don’t have brown sugar?
You can substitute brown sugar with granulated sugar by adding 1 tablespoon of molasses for each cup of granulated sugar. It will mimic the moisture and flavor of brown sugar.
In a Few Words
Baking these Cozy Brown Butter Chocolate Chip Cookies is more than just following a recipe; it’s about creating memories and indulging in sweet moments. Whether you enjoy them with family or savor them during lonely evenings, each bite carries a bit of warmth that brightens your day.
Conclusion
These Brown Butter Chocolate Chip Cookies are a scrumptious treat that brings back nostalgia and comfort like nothing else can. The rich, golden flavor of brown butter combined with luscious chocolate chips makes each cookie irresistible. Perfect for any occasion or just to satisfy your sweet tooth, this recipe proves that baking can be a delightful, unhurried experience. So grab your ingredients, turn on some cozy music, and enjoy the wonderful ritual of baking. You won’t regret it! Happy baking!