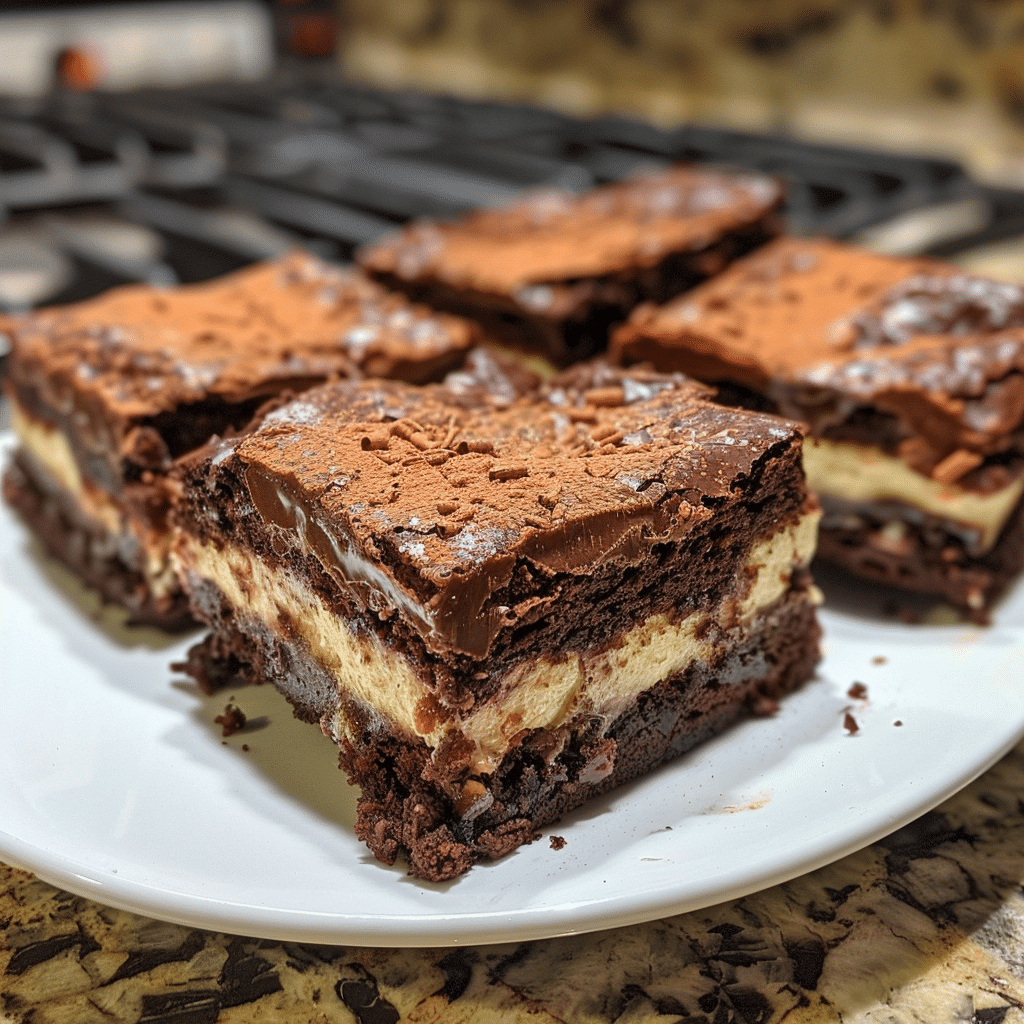
The crackle of the crust gives way to a dense, fudgy brownie layer, its earthy bitterness mellowed by a velvety coffee-infused center. Above it lies a cloud of creamy, citrus-spiked sponge that dissolves into the palate’s folds like a whispered secret. No alcohol taints the aroma—just the deep, toasted scent of ground espresso and cocoa, a fragrance that lingers like a midnight indulgence. This is not a replica—it is reinvention.
Gluten-Free Tiramisu Brownies exist in the intersection of craving and compromise. They borrow the soul of Venetian tradition but build a new narrative through allergen-free ingenuity. The coffee-soaked layers achieve their signature moistness without liquid alchemy, while the gluten-free crust cradles the delicate balance of bittersweet and sweet. Every bite is a rebellion against rigidity.
Imagine a dessert that satisfies the nostalgia of tiramisu while honoring your dietary needs. These brownies are more than a substitute—they are a celebration of texture and flavor, proving that elegance need not be exclusive. The secret lies in the alchemy of coffee and cocoa, the precision of layer adhesion, and the warmth of shared culinary curiosity.
- Prep Time – 30 minutes
- Cook Time – 25 minutes
- Total Time – 5 hours 30 minutes
- Servings – 12 large slices
- Difficulty – Intermediate
- Cuisine – Italian-inspired fusion
Why This Recipe Works
Gluten-Free Tiramisu Brownies defy the misconception that dietary restrictions equate to flavor sacrifice. The espresso-rich crust forms in a single pan, avoiding cross-contamination risks yet delivering structure. Its fine crumbs mimic the bite of traditional ladyfingers without the gluten, binding seamlessly with the coffee syrup.
The center layer’s creamy texture derives from a stabilized whipped egg yolk foundation. Room-temperature eggs bloom more easily, creating a custardy base that clings to each coffee-soaked brownie layer. Chopped chocolate enhances the coffee notes exponentially—its bitterness cutting through the sweetness without overpowering.
Baked brownie slabs maintain their integrity through controlled moisture. The espresso-syrup infusion is applied warm, allowing it to penetrate the dense gluten-free structure as it cools. This method replaces the traditional alcohol soak with a fragrant, nonalcoholic alternative that heightens the dessert’s coffee character.
Refrigeration transforms the final assembly. The cold firmness stabilizes the coffee-soaked layers while allowing the filling to develop a subtle tang, as if touched by amaretto’s elusive warmth. This cold-aging technique is critical for maintaining layer definition without icy residue on the palate.
Texture is the silent conversation between the dense chocolate base, the airy custard, and the crisp crust. Gluten-free flours, when combined with almond meal, produce a structure both sturdy and tender. The result is a dessert that slices neatly but melts indulgently against the tongue.
The Cultural Soul of Gluten-Free Tiramisu Brownies
Originating in late 20th century Italy, classic tiramisu translates “pick me up”—a drink for courage. Its layers of ladyfingers, coffee, and mascarpone represent a marriage of convenience and tradition. My adaptation honors this heritage while dismantling ancient allergens through modern flour blends and caffeine extraction techniques.
Gluten-free baking emerged not from decadence but necessity. This brownie version bridges the gap between gluten-sensitive palates and the unapologetic boldness of tiramisu. The substitution of wheat-based crust with almond meal and gluten-free flour isn’t reduction—it’s elevation. These ingredients yield a more intense nut flavor and chewy bite that complements the silky custard.
While traditional recipes use Marsala wine, this version relies on brewed espresso and citrus zest for depth. The vinegar-to-broth substitution in the custard (using black tea and apple cider vinegar) maintains the balance of acid and richness. Such changes reflect evolving dietary philosophies yet preserve the dessert’s comforting contradictions.
The chocolate layer introduces an American dessert tradition to the Italian format. Dark cocoa powder’s complexity contrasts with the brownie’s simplicity. This fusion respects both cuisines, offering a novel experience for purists and innovators alike. The result is a dessert that feels both familiar and groundbreaking.
Cooking with this recipe is a meditation on adaptation. Every substitution carries intent—a nod to ancestors while speaking to contemporary needs. The coffee-soaked layers, once marinated in liqueur, now cradle stories of inclusivity and persistence.
The Elements of the Dish
- 2 cups almond meal: Offers a fine, gritty texture that mimics traditional ladyfingers. Freshly ground almonds deliver a stronger flavor than pre-packaged mixes. Look for blanched almonds to eliminate bitterness from skins.
- 1/2 cup gluten-free flour blend: Creates structure while maintaining a crumbly base. The ratio of rice flour to potato starch affects moisture retention—balance it for optimal adhesion.
- 3/4 cup dark cocoa powder: Intensifies the coffee character without added bitterness. Ensure it’s non-alkalized for better reaction with acidic ingredients in the custard.
- 1/2 cup coconut sugar: Adds caramel undertones while resisting grittiness. Its lower glycemic index works well with alcohol-free custard for balanced texture.
- 1/2 cup unsalted butter: Binds ingredients without leavening effects. Clarified butter improves stability if you want a richer, toasty flavor.
- 1 teaspoon baking powder: Gently lifts the crust layer. Avoid double-acting types that can cause uneven rising in cold environments.
The Editor’s Guide to Sourcing
Almond meal is the keystone of this recipe. Seek artisanal batches—commercial products often incorporate anti-caking agents. For custard, high-quality eggs rule all. Check for firm whites and yolks that hold their roundness, indicators of freshness and emulsification potential.
Don’t compromise on coffee. Medium-ground espresso or robusta beans produce optimal extraction without over-acidity. Freshly brewed espresso is non-negotiable—pre-made varieties oxidize during storage. A stovetop method preserves volatile compounds essential for flavor depth.
The coconut sugar requires careful melting. Granulated varieties with visible crystallization won’t dissolve fully. Opt for fine-textured brands that offer a clean amber hue when heated. Dark cocoa powder should have a vibrant, almost red tinge—bleached versions mute the flavor profile.
Gluten-free flour blends matter. A mix of tapioca, rice, and potato starch produces chew without gumminess. Avoid blends heavy in xanthan gum, as they bind excessively and mask the natural texture of almond meal. The butter must remain solid until the final mixing stage to ensure proper emulsification.
Every element must harmonize rather than clash. The cold custard relies on precise temperature contrasts to create a custard body that holds its shape yet flows on the tongue. These materials are not interchangeable—they are intentional components in a sensory narrative.
The Step-by-Step Masterclass
Prep the Bases
Sift gluten-free flour into a bowl and set aside. In a separate bowl, warm butter with coconut sugar until the sugar dissolves—visual cue is golden color and faint caramel aroma. Add almond meal and cocoa powder, blending until uniform. The mixture should resemble wet sand when compressed.
Press half the dough evenly into a parchment-lined pan. Use the back of the dough to smooth imperfections. Chill in freezer for 10 minutes to firm the base before adding coffee glaze. This cold shock prevents the glaze from pooling unevenly during infusion.
Create the Coffee Infusion
Brew 1 cup of espresso using coarse grounds—over-extracted liquid causes bitterness. Mix with 1/4 cup cocoa powder until fully dissolved, then warm gently. Brush over the dough layer until it glistens but doesn’t weep, using a pastry brush to control saturation. The glaze should seep into creases without softening the structure.
Achieve Custard Perfection
Beat egg yolks at room temperature until pale amber (1-2 minutes). Fold in 1 1/2 cups powdered sugar and 3 tablespoons brewed coffee. The emulsion achieves satiny smoothness when blended at low speed, preventing air bubbles that cause sogginess later. Add 1/4 teaspoon finely grated orange zest for aromatic lift.
Slowly whisk in 4 cups whole milk or coconut milk until fully combined. Cook over low heat until thick enough to coat the back of a spoon—visual cue is visible steam without boiling. Strain through fine mesh to create a custard capable of clinging to each layer without separation.
Build the Layers
Press the second dough layer into the pan, then refrigerate until firm. The second coffee glaze (espresso and cocoa) should be applied when the dough reaches room temperature. This controlled timing ensures consistent layer adherence after slicing.
The Kitchen Science
Gluten-free flours form no gluten network, relying on almond meal’s fat content to bind. The coffee syrup’s sugar crystallizes briefly as it cools, creating adhesive surfaces between layers. Refrigeration promotes gelatinization of the custard’s starch components, firming without ice formation.
The Maillard reaction in the baked crust isn’t just visual—it’s flavor amplification. Toasted almond meal and cocoa produce volatile aromatic compounds that mirror alcohol’s depth. Temperature shock from the freezer preserves this complexity during infusion.
Emulsification of egg yolks and milk produces a custard with inherent stability. The sugar’s role extends beyond sweetness—it acts as an antifreeze agent, inhibiting crystal formation in the refrigerated dessert. This science underlies every sensory delight in the final product.
Pro-Level Secrets
Toast the Almond Meal: Dry toast in a skillet for 5 minutes before measuring. The caramelization creates depth that no added flavor can replicate.
Use Double Coffee: Brew at twice standard strength to compensate for dilution by the layers. The custard’s espresso will balance this intensity.
Chill Strategically: Freeze dough layers at each stage rather than refrigerating. The cold stabilizes texture before moisture from subsequent layers disrupts it.
Grate Citrus on the Microplane: Fresh zest introduces essential oils that perfume the custard and brownie without requiring alcohol-based extracts.
Bake in Three Rounds: Allow the brownie layers to cool fully between baking to prevent the coffee glaze from melting. This ensures clean slices later.
Infuse After Final Chill: Apply the last coffee glaze while the base is frozen. The thawing process guarantees even absorption without sogginess.
Common Mistakes to Avoid
Overloading with Coffee – Too much espresso turns the brownie bitter. Balance coffee strength and quantity to let chocolate shine.
Skipping the Freezing Step – Warm dough layers absorb fluid inconsistently. This creates lumpy coffee soaks and weak layer separation.
Using Instant Coffee – Granules leave gritty residue. Even ground coffee in an immersion brewer delivers smoother infusion.
Overtapping the Dough – Compression introduces excess moisture between layers. Press evenly but handle gently to preserve crumb structure.
Underrefrigerating the Custard – Room-temperature custard slides between layers. Chill to 40°F/4°C before assembly for proper adhesion.
Creative Adaptations
| Substitution | Impact | Recommended For |
|---|---|---|
| Replace almond flour with tiger nut flour | Produces a subtler nut flavor but maintains structural integrity | Those avoiding tree nuts |
| Swap coconut milk for oat milk | Softens custard body but eliminates dairy | Lactose-sensitive eaters |
| Use carob powder instead of cocoa | Mutes bitterness entirely—opt for 1:1 substitution without adjustment | Those avoiding caffeine |
| Replace vanilla extract with bourbon vanilla substitute | Introduces faint woodsy notes—pairs beautifully with cinnamon-infused coffee | Warming dessert variations |
| Add 1/2 cup dark chocolate shavings | Creates textural contrast and enhances flavor complexity | Chocolate enthusiasts |
Plating & Pairing
Serve chilled with a dusting of cocoa powder and a piped line of dairy-free whipped cream. A sprig of fresh orange thyme adds fragrance without visual mess. The aroma of espresso and citrus should envelop guests as they slice through layers.
Pair with cardamom-spiced hot chocolate or a cold almond milk latte. The spices in the drink complement the warm undercurrent of the custard. For side dishes, offer dark chocolate truffles alongside to emphasize the dessert’s boldness without repetition.
Set the table with black and gold tableware to evoke tiramisu’s origins. Dim lighting amplifies the visual contrast between layers, making each slice feel like a theatrical performance. The ambiance should mirror the dessert’s dramatic balance of sweet and bitter.
Preservation Guide
| Storage Method | Duration | Best Reheated? |
|---|---|---|
| Refrigerator | 5 days | Yes—warm at 250°F gently |
| Freezer (unlayered components) | 1 month | Yes—thaw in refrigerator first |
| Freezer (assembled) | 2 weeks | No—ice crystals disrupt texture |
| Room Temperature | Up to 2 hours | Partially—best eaten fresh |
Questions from Our Kitchen
Can I replace gluten-free flour with coconut flour?
Coconut flour absorbs more liquid—substitute 1/3 cup for every 1/2 cup required. Increase binding agents (eggs or xanthan gum) to maintain structure. The flavor will also become more coconutty, shifting from traditional profiles.
How do I fix runny custard layers?
Return custard to stove. Gently reheat while stirring continuously until coats the spoon. If separation occurs, temper by whisking 1 tbsp cornstarch into the mixture before heating. This restores stability without altering flavor.
Why does my crust fall apart when slicing?
The crust underbaked—ensure it firms enough to hold without collapsing. Check with a paring knife: it should resist slight pressure but give. If layers have already separated, freeze the assembled dessert for 15 minutes before serving.
Can I use store-bought gluten-free brownies?
Absolutely, but choose dense, fudgy varieties that soak evenly. Avoid chewy types like chewy with a crumbly center; they’ll absorb glaze inconsistently. Adjust coffee syrup thickness to match the brownies’ density in soaking tests.
How to make a vegan version?
Substitute eggs with applesauce (3/4 cup per egg), use aquafaba at stiff peaks, and replace butter with coconut oil. The custard needs agar-agar for setting—whisk gradually over medium heat until fully dissolved. This maintains texture challenges but works with vegan constraints.
Conclusion
Gluten-Free Tiramisu Brownies are more than dessert—they are dialogue across centuries and cultures. By marrying Italian tradition with modern dietary needs, you create a centerpiece for both celebration and comfort. Tonight, let your kitchen become a canvas where history and innovation blend effortlessly. Bake these brownies, and taste the story of adaptation in every bite.
Print
Gluten-Free Tiramisu Brownies: A Decadent Adaptation of an Italian Classic
- Total Time: 330
- Yield: 12 large slices 1x
- Diet: Vegetarian
Description
A layered gluten-free dessert reimagining tiramisu with a coffee-infused crust, fudgy brownie base, and citrus-kissed cream filling. Creamy textures and rich espresso-chocolate flavors celebrate allergen-free indulgence without compromising authenticity.
Ingredients
1 1/2 cups almond flour
1/2 cup unsalted butter, softened
1/3 cup powdered sugar
1/4 cup cocoa powder
1/4 cup instant espresso powder
1/2 tsp salt
1 1/2 cups gluten-free flour blend (oat or rice)
1 cup sugar
2 large eggs
1/2 cup chopped dark chocolate
1/2 tsp baking powder
1/4 cup coffee granules, dissolved in 6 tbsp warm water
4 egg yolks
1/3 cup Greek yogurt (or non-dairy alternative)
1 cup heavy cream or coconut cream
1 tbsp powdered sugar (for whipping)
Zest of 1 orange or lemon
1/2 tsp vanilla extract
Instructions
Preheat oven to 350°F (175°C) and line an 8-inch square pan with parchment paper
In a bowl, mix almond flour, butter, cocoa powder, espresso powder, and 2 tbsp sugar. Press half the mixture into the pan as the crust
Bake crust for 12 minutes, then let cool slightly
In a separate bowl, combine gluten-free flour, baking powder, and 1/2 cup sugar. Whisk in butter, then add eggs. Pour over cooled crust
Bake brownie layer 18-20 minutes until toothpick comes out with moist crumbs
While baking, dissolve coffee granules in warm water and cool. Brush syrup onto hot brownie layer
In a stand mixer, whip egg yolks and powdered sugar until thick. Fold in Greek yogurt and citrus zest
Whip cream with vanilla extract until soft peaks form. Fold into yolk mixture
Spread this creamy layer over cooled brownie. Freeze for 1 hour before slicing into 12 pieces. Chill until ready to serve
Notes
Use xanthan gum if your gluten-free flour lacks it
Substitute coconut cream for a vegan version. Store in refrigerator for up to 5 days, or freeze for 1 month
For stronger coffee flavor, double the espresso powder amounts
- Prep Time: 30
- Cook Time: 25
- Category: Dessert
- Method: Baking
- Cuisine: Italian-inspired fusion
Nutrition
- Serving Size: 1 slice
- Calories: 320
- Sugar: 22g
- Sodium: 135mg
- Fat: 19g
- Saturated Fat: 11g
- Carbohydrates: 34g
- Fiber: 3g
- Protein: 5g
- Cholesterol: 45mg