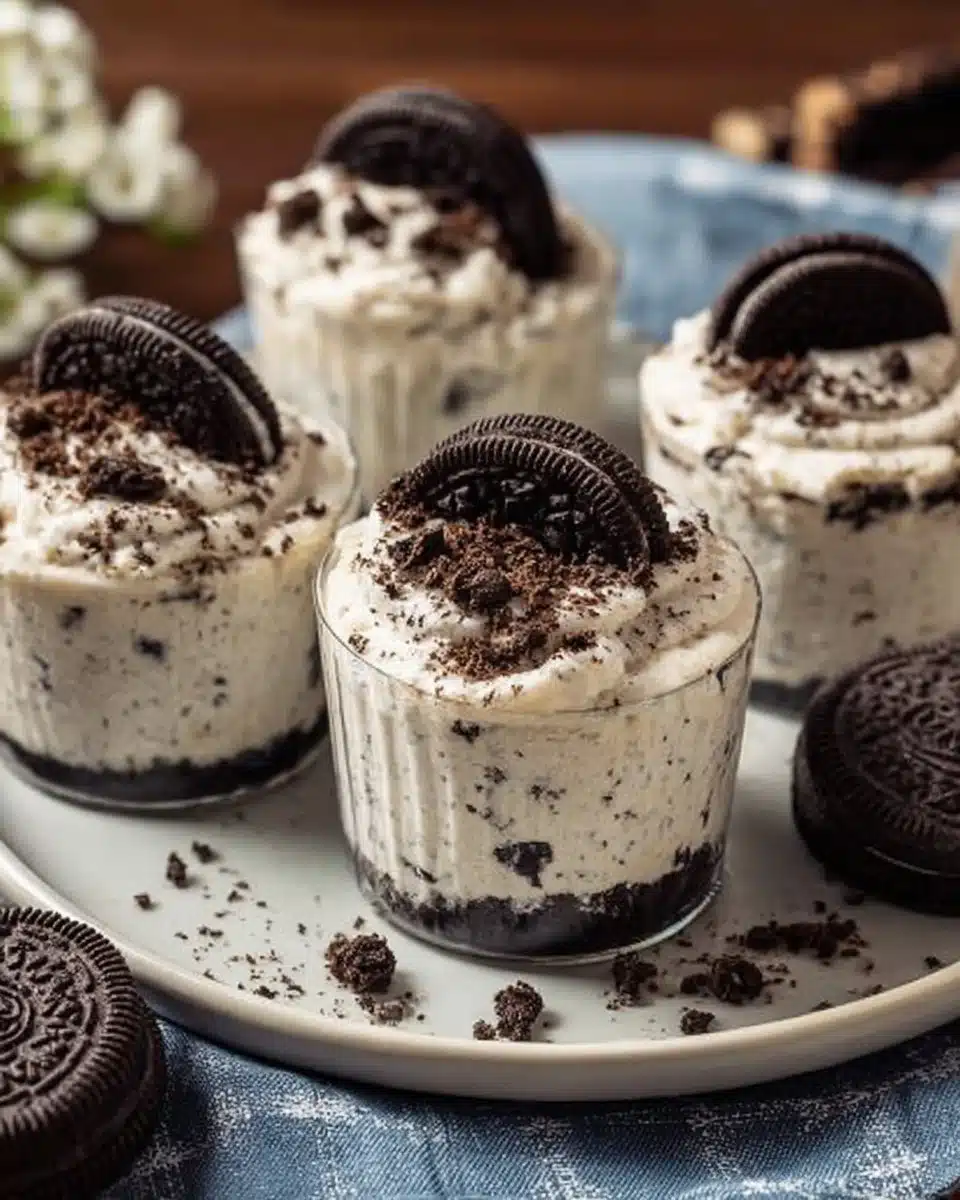
Indulge in Creamy Joy with These Easy No-Bake Cheesecake Cups
It’s one of those cozy afternoons, the kind that invites you to linger in the kitchen a little longer than usual. The sun filters through the window, casting golden light on my countertop, where I find the sweet remnants of a cookie-loving household. This is the perfect moment to whip up something effortlessly delightful—Oreo No-Bake Cheesecake Cups! With the soft, creamy tang of cheesecake layered over a crunchy cookie base, these little cups of happiness promise to satisfy cravings without demanding hours of labor. They are the kind of treat that brings everyone together, beckoning laughter and stories shared over sweet bites.
Life can be hectic, filled with responsibilities and endless to-do lists. Yet, in the midst of it all, there’s something magical about creating a simple dessert that lifts the spirit. These no-bake cheesecake cups embody that feeling perfectly: they are quick, delicious, and easy to prepare, making them an ideal recipe for family gatherings or just a sweet moment to enjoy at home.
Why You’ll Love This Recipe
These Oreo No-Bake Cheesecake Cups are everything you could wish for in a dessert: they are creamy, decadent, and come together with minimal fuss. With just a handful of ingredients, you’ll cook like a superhero in your kitchen, all while avoiding the stress of baking. The combination of the crunchy Oreo base and the fluffy cream cheese filling creates a delightful texture that dances with each spoonful.
Perfect for any occasion, whether it’s a birthday celebration, a holiday gathering, or simply a Friday night treat, these cheesecake cups will impress your friends and family. The beauty of this recipe lies in its flexibility; you can easily adjust ingredients to fit your family’s preferences or dietary needs. Let’s dive into making these delightful treats!
Ingredients for Oreo No-Bake Cheesecake Cups
- 1 (8 oz) block of cream cheese, softened
- 1 (8 oz) container of Cool Whip or whipped topping
- 2/3 cup powdered sugar
- 1 teaspoon vanilla extract
- 24-26 Oreo cookies (or more, if desired)
Ingredient Notes
- For a lighter option, you can use low-fat cream cheese.
- If you can’t find Cool Whip, homemade whipped cream works perfectly—just whip heavy cream until soft peaks form and gently fold it in.
- If you wish to avoid the classic Oreos, consider using chocolate sandwich cookies or gluten-free options for a comparable taste and texture.
How to Make It
Creating these delectable no-bake cheesecake cups is as easy as one, two, three!
Step 1 – Prepare the Cookie Base
Start by placing the Oreo cookies in a plastic bag. Seal the bag tightly, making sure no air can escape. Now, channel your inner child, grab a rolling pin (or a sturdy wooden spoon), and start crushing those cookies. You want a mix of fine crumbs and some bigger pieces for texture.
Once they’re crumbled, spoon about 1½ to 2 tablespoons of the crushed Oreos into the bottom of each of your small dessert dishes. Make sure you’re using dishes that can hold at least ¾ to 1 cup of filling. Set these aside—they’re about to become the little foundation of creamy delight!
Step 2 – Make the Cheesecake Filling
In a mixing bowl, beat your softened cream cheese and powdered sugar using a hand mixer or a stand mixer until creamy and smooth. There’s something so satisfying about watching the cream cheese transform from chunky to silky—trust me, it’s worth savoring.
Once everything is well combined, add the vanilla extract and give it another gentle mix. Now, it’s time to fold in the Cool Whip. This step is crucial; you want to be gentle so your filling remains nice and fluffy. Use a spatula to incorporate the Cool Whip until everything is beautifully blended and creamy. Lastly, fold in the remaining crushed Oreos to keep that signature cookie flavor throughout every bite.
Step 3 – Assemble and Chill
Now for the fun part! Divide your luscious cheesecake filling evenly among the dessert dishes, gently pressing it atop the crushed Oreos. Each cup should be filled to the brim, promising a spoonful of joy with each serving. Once you’ve divided everything, cover the cups with plastic wrap or foil and chill them in the fridge for about an hour before serving. Allowing them to set will help everything meld beautifully.
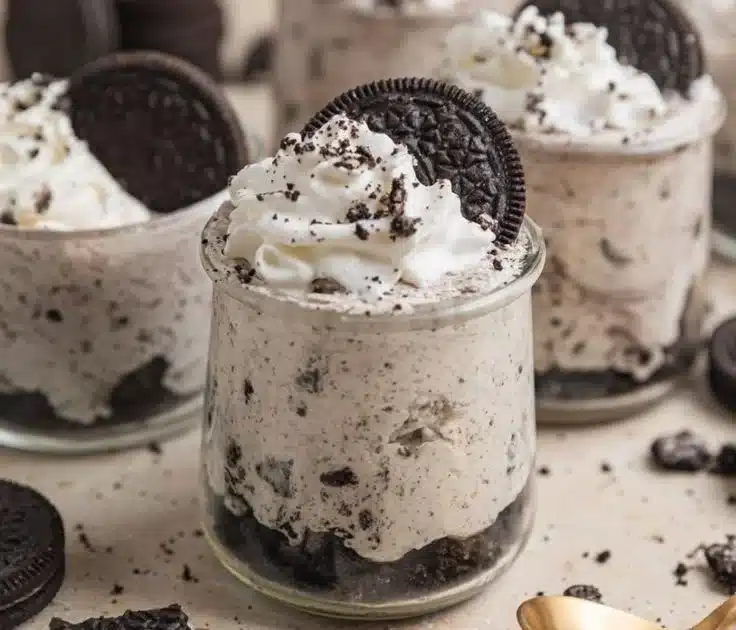
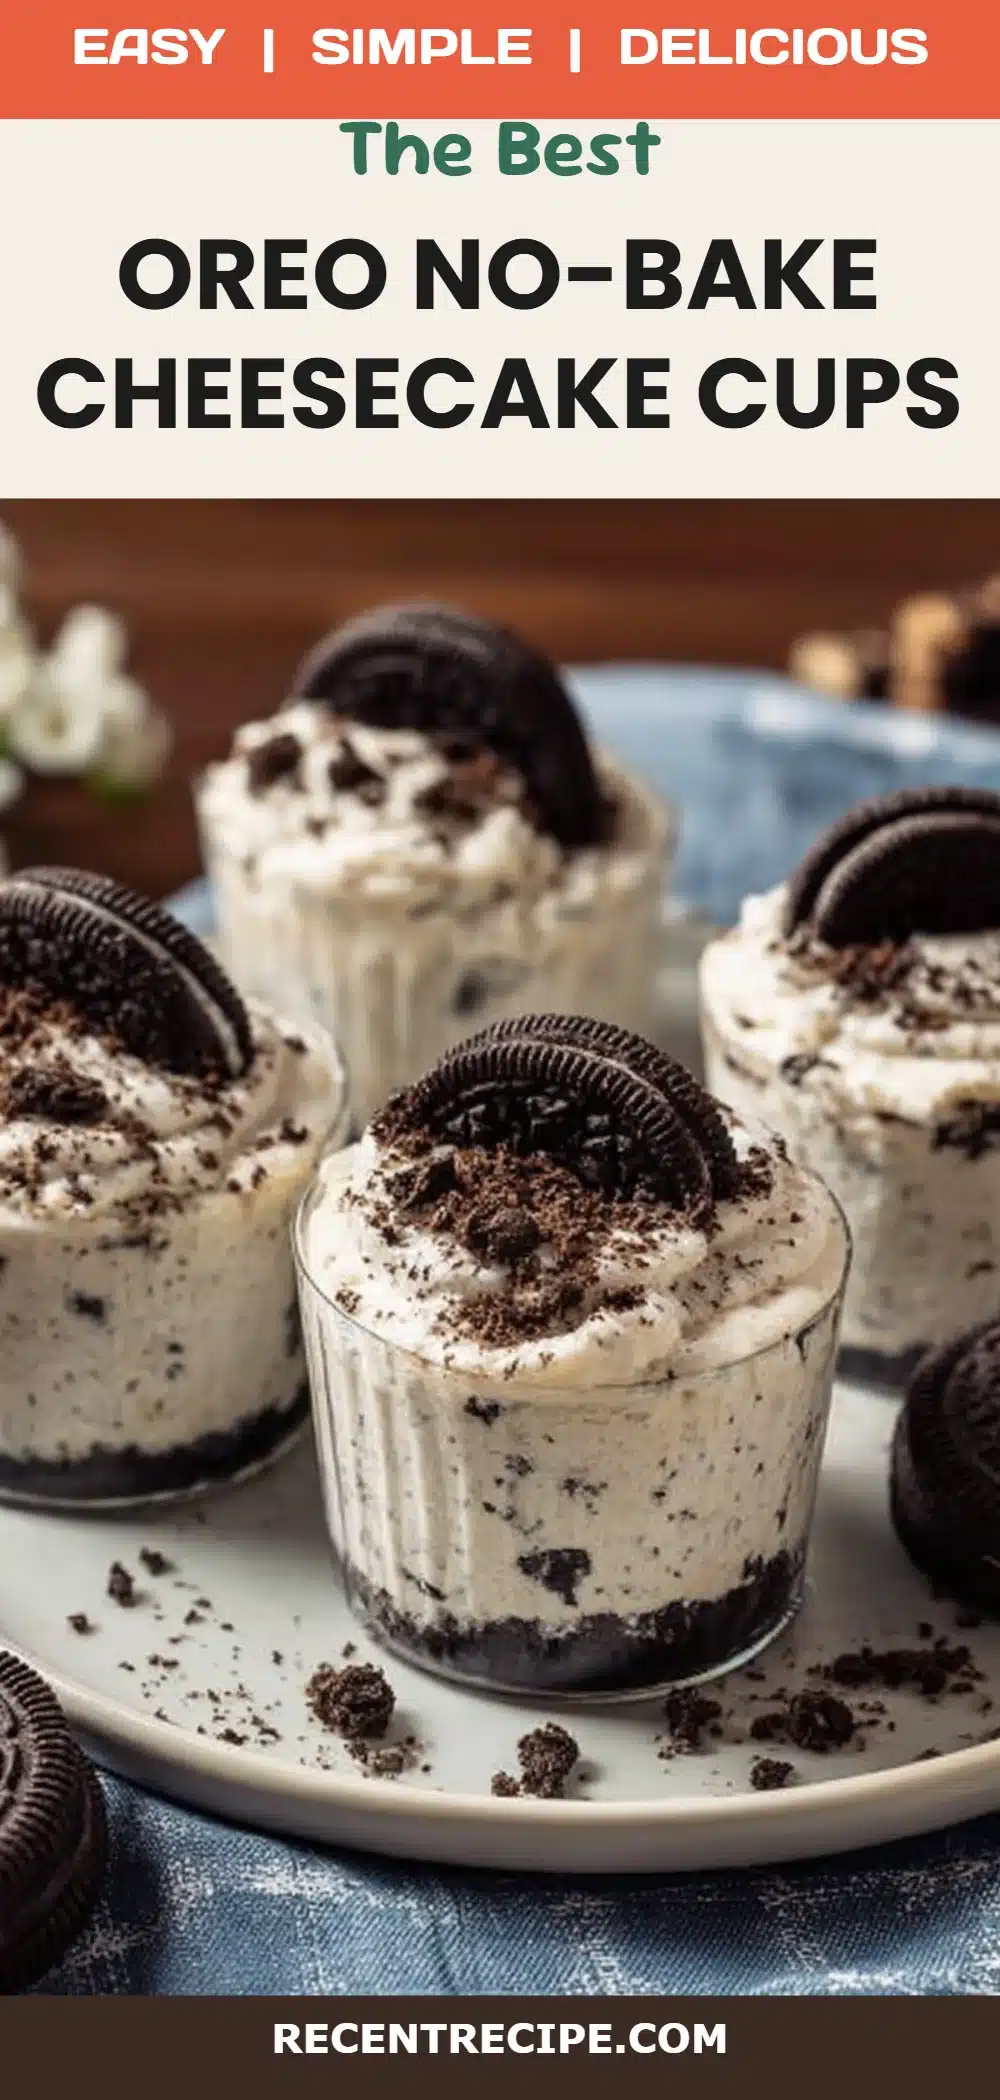
When you’re ready to indulge, dollop on some more whipped cream and sprinkle with crushed Oreos for a final touch that’s as Instagram-worthy as it is delicious.
Tips for Success
- Chill Out: Ensure your cheesecake cups chill long enough for the flavors to deepen and the textures to firm up; an hour is ideal, but if you can resist, a few extra hours will make them even better.
- Mix It Right: Take your time folding in the Cool Whip; this keeps the filling light and airy.
- Presentation Counts: If you’re serving guests, consider using glass cups or jars to highlight those beautiful layers of creamy cheesecake and chocolatey cookie.
Recipe Variations
- Mint Chocolate Bliss: Swap regular Oreos for mint-flavored ones and add a few drops of peppermint extract to the filling for a minty twist.
- Peanut Butter Dream: Mix ½ cup of creamy peanut butter into the cheesecake filling for a delicious, nutty flavor that complements the Oreos.
- Fresh Fruit Surprise: Top off with a layer of fresh berries or banana slices before adding the whipped cream. The fruit adds a refreshing contrast to the rich cheesecake.
- Chocolate Indulgence: Drizzle with chocolate syrup just before serving for extra decadence that pairs perfectly with the creamy filling.
- Coffee Lovers: Mix a tablespoon of instant coffee granules into the cheesecake filling for a delightful mocha flavor that’s perfect for coffee enthusiasts.
Serving Ideas
These cheesecake cups are perfect for any occasion! Serve them at birthday parties, holiday feasts, or movie nights for a sweet escape.
You can also package them as take-home treats for guests or serve them at potlucks to become the star of the dessert table. Consider pairing them with a scoop of vanilla ice cream or a warm mug of hot chocolate for an indulgent experience.
Storage and Freezing
These cheesecake cups stay fresh in the refrigerator for up to 3 days. Just keep them covered to prevent them from absorbing any odors in the fridge. You can also freeze the cups if you want to prepare them in advance. Just be aware that the texture may change slightly after freezing, but they will still be delicious! When you’re ready to enjoy, let them thaw in the refrigerator overnight.
Nutrition Facts (per serving)
| Calories | Protein | Carbs | Fat | Fiber | Sodium | |———-|———|——-|—–|——-|——–| | 285 | 3g | 34g | 16g | 1g | 190mg |
FAQ About Oreo No-Bake Cheesecake Cups
Can I make these cheesecake cups ahead of time?
Absolutely! These cheesecake cups can be made up to two days in advance and stored in the fridge until you’re ready to serve. Just keep them covered to maintain freshness.
What if I don’t have Cool Whip?
No worries! You can easily substitute homemade whipped cream by whipping heavy cream until fluffy and soft peaks form. This will give you a wonderfully light texture in your cheesecake filling.
Can I change the flavor of the cheesecake?
Definitely! The basic cheesecake filling is very versatile. Feel free to add flavors such as lemon zest, cocoa powder, or even a splash of coffee for a twist.
How can I make this recipe gluten-free?
For a gluten-free version, simply use gluten-free chocolate sandwich cookies in place of the regular Oreos.
How long does this dessert last?
If stored properly, these cups will last for about 3 days in the fridge. If you freeze them, they should be consumed within a month for the best flavor.
In a Few Words
There’s something heartwarming about bringing a little sweetness into the world, and these Oreo No-Bake Cheesecake Cups are sure to delight. Each bite feels like a comforting hug, layered with creamy joy and crunchy chocolate goodness. It’s more than just a dessert; it’s a shared experience, a celebration of simple moments with loved ones.
Conclusion
As I take a moment to savor these scrumptious Oreo No-Bake Cheesecake Cups, I can’t help but think about how easy it is to create something beautiful and delicious in just a short time. It’s recipes like these that remind us how important it is to carve out space for joy and connection, even amidst our busy lives. So gather your ingredients, call your family to the kitchen, and whip up these delightful treats. You’ll be rewarded with smiles, laughter, and that wonderful feeling of sharing something truly delicious. Enjoy!
Print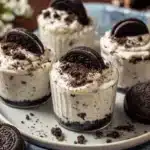
Oreo No-Bake Cheesecake Cups
- Total Time: 60 minutes
- Yield: 4 servings 1x
- Diet: Vegetarian
Description
Delightful no-bake cheesecake cups featuring a creamy filling layered over a crunchy Oreo base.
Ingredients
- 1 (8 oz) block of cream cheese, softened
- 1 (8 oz) container of Cool Whip or whipped topping
- 2/3 cup powdered sugar
- 1 teaspoon vanilla extract
- 24–26 Oreo cookies
Instructions
- Prepare the cookie base: Crush the Oreo cookies in a bag and spoon 1½ to 2 tablespoons into dessert dishes.
- Make the cheesecake filling: Beat cream cheese and powdered sugar until smooth, add vanilla extract, then gently fold in Cool Whip and remaining crushed Oreos.
- Assemble and chill: Divide the filling among the dishes, cover, and chill in the fridge for about an hour.
Notes
For a lighter option, use low-fat cream cheese. Substitute Cool Whip with homemade whipped cream if needed.
- Prep Time: 15 minutes
- Cook Time: 0 minutes
- Category: Dessert
- Method: No-Bake
- Cuisine: American
Nutrition
- Serving Size: 1 cup
- Calories: 285
- Sugar: 18g
- Sodium: 190mg
- Fat: 16g
- Saturated Fat: 10g
- Unsaturated Fat: 4g
- Trans Fat: 0g
- Carbohydrates: 34g
- Fiber: 1g
- Protein: 3g
- Cholesterol: 30mg
Keywords: no-bake, cheesecake, Oreo, dessert, easy recipe, creamy, sweet treat